What?!? No patterned paper?!? Seriously?!? That was my first thought, then I remembered all the cool stamping techniques that I used to use and a little scene started to take shape in my mind.

For my first card I used You Move Me stamps and Die-namics from MFT to create this fun one layer card with an emboss resist scene. It's actually a little more involved than you might think, but I'll walk you through the steps. I love the end result!
I used MFT Premium Dye Inks to emboss the images and because they're dye inks and dry quickly, I inked each stamp with Versamark before inking it with the colour. (I wanted to make sure and tell you this in case I forget when describing the steps.) I started with a card base of Sweet Tooth then inked the road in Versamark, then Black Licorice Premium Dye Ink, then stamped it onto the card base and heat embossed it with clear embossing powder. Next I used painter's tape to create a 3/4" border around the rectangle in the middle of my card. I inked the circle with Versamark, then sponged on just a touch of Lemon Drop Premium Dye Ink (for a yellow glow instead of a solid yellow circle), then stamped the moon in the corner and embossed it with clear powder.
Next I added the scooter using Wild Cherry Premium Dye Ink (with versamark and clear embossing) then I added the exhaust puffs with just Versamark and clear powder. Then I created the night sky by sponging on some Weathered Wood Distress Ink followed by Faded Jeans Distress Ink, making the colour slightly lighter around the moon to mimic a glow. The best part was peeling off the painter's tape to reveal my little scene. Sweet!!! The edges needed a little more definition though, so I used a ruler and a copic multiliner pen to trace around the rectangle. I cut out two Sweet Tooth clouds using the You Move Me Die-namics and popped one of foam tape for a touch of dimension, then I stamped the "beep beep" using Black Licorice Premium Dye Ink.
On the inside I stamped the scooter again with Wild Cherry Premium Dye Ink and added the exhaust fumes and another sentiment from You Move Me using Black Licorice Premium Dye Ink.
**********
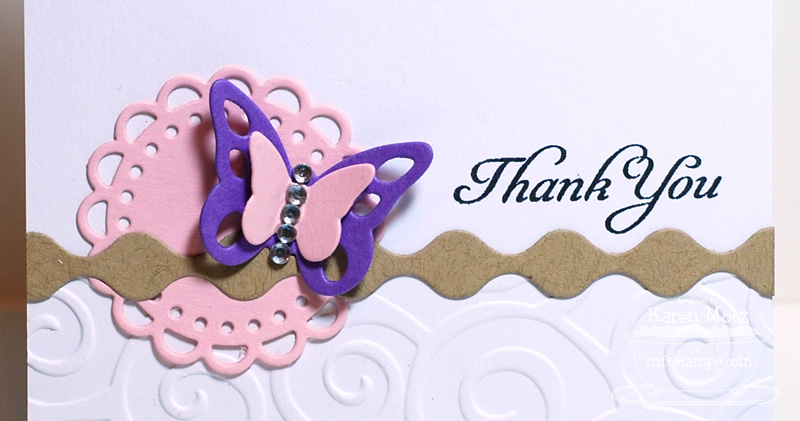
My second card is also a clean and simple card and this time I used Die-namics with a simple sentiment.

I started with a card base of Sweet Tooth and embossed the bottom of it with the D'vine Swirls embossing folder. I used the Squiggle Border Die-namics to cut out the Kraft strip and the Mini Doily Circles Die-namics to cut out the Pink Lemonade circle. The Butterflies Die-namics were perfect for creating the butterly accent from Pink Lemonade and Grape Jelly card stock and I added some rhinestones to the body. I stamped the sentiment from Vintage Cameo using MFT Black Licorice Premium Dye Ink. The top of the card seemed a little too bare so I added three rhinestones. The layout is CTS#14.
Check out the dimension on the butterflies.
**********
My last card is a clean and simple masculine birthday card. Guy-cards are always trickier for me to create than girl-cards and I find it helps to stick with a clean design.

I used supplies from My Favorite Things, starting with a card base of Whip Cream. The I cut another layer of Whip Cream and ran it through my geometric circles embossing folder. I cut a strip of patterned paper from the My Mind's Eye Notable collection and layered it onto a strip of Nightshift Blue. I used the Fishtail Flags Layers STAX Die-namics to cut out the Whip Cream sentiment strip. The sentiment is from Clearly Sentimental about Birthdays and I stamped it with MFT Black Licorice Premium Dye Ink. I added a Blu Raspberry button balloon and tied it to the sentiment strip using Hemp Cord.
Be sure to hop over to the MFT Blog for a list of all participating designers.
Here are the supplies I used on the Beep Beep card:
Here are the supplies I used on the Thank You card:
Here are the supplies I used on the Happy Birthday card:
Thanks for stopping by!
Karen


6 comments:
awww... your first card just makes me happy! such a cute scene! beautiful simple designs and colors, too. fabulous work, Karen!
These are awesome Karen!
Wow! Awesome cards!!
You are rockin' the CAS cards! Love that button balloon on the last card - clever!
fabulous C&S cards girlie!
Great CAS cards. Love the embossing.
Post a Comment