Showing posts with label Our Craft Lounge. Show all posts

Sunday, July 1, 2012

MFTeaser - Let's Celebrate You

Welcome to day six of seven fabulous days of MFT teasers!!!


It's Pure Innocence day and I've created a sweet birthday card to add to my stash, using Pure Innocence Birthday Girl. Isn't she absolutely adorable!!!

I stamped her with Memento Tuxedo Black and colored her with copic markers, but I paper pieced her dress with a fun floral print from the Echo Park So Happy Together collection. I couldn't believe my luck when I searched through my stash of buttons and found this little gem with the star in the center. I thought it was perfect for the balloon, and the edges are really sparkly IRL too! I cut out the red patterned paper using the new Designer Labels 3 STAX Die-namics and layered some circles which I cut out using the Circles 2 STAX Die-namics.

Here's that gorgeous Plentiful Petals Die-namics again, cut from two patterned papers with a yellow button center. I used the Fishtail Flags STAX Die-namics to cut out the teal piece for the vertical strip and added some Whip Cream grosgrain ribbon along the horizontal seam in the background. The base layer is Sno Cone card stock.

On the inside I stamped the image with Memento Lady Bug and another sentiment from the set with black ink. The Jumbo Squiggle Border was perfect for cutting out the striped paper accent.


Here are the details about the upcoming release on July 3 at 10 PM EST:
  • You can attend the New Release Party on July 3 from 8-10 PM EST HERE in the MFT forum, where you can enjoy fun, games, and PRIZES!
  • The MFT release, including all new stamp sets and Die-namics, is on July 3 at 10 PM EST.  You'll find all the newest products HERE at release time.
  • The guest designer contest is ON!  Check out the forum for details on how YOU can win $200 in stamp sets and Die-namics, and play along with the MFT Design Team for a month.
  • If you'd like to see all the teasers for today, please click on over to the MFT Blog NOW.  Be sure to leave comments as you go for the chance to win one of 2, $10 gift certificates given away daily.  The winners will be posted on July 3 just before the release party, on the MFT blog.
Here are the Die-namics I used:


Pin It

Thanks for stopping by!
Karen

Monday, June 27, 2011

A Simple Set of Cards

This is my final week as the featured artist on the Our Craft Lounge blog, and can I just say, I've had a blast!! Thank you SO much Our Craft Lounge!!!

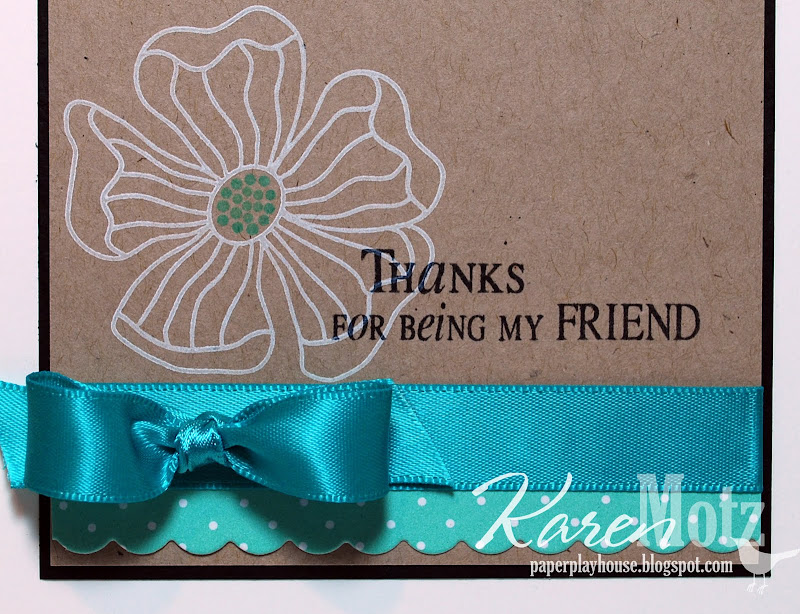
Today I thought I'd showcase some of the wonderful sentiments in Say it With Flowers so I created a simple set of eight cards. I used most of the 'friendship' type sentiments, but this set is so versatile, you could create get well cards, thank you's and birthday cards too!

The flower is from Pretty Petals which I used last week to make the place card holders.

I used a simple colour scheme of white and kraft then paired it with either teal or pink and added a pop of black. I used four of the sentiments and made both a pink and teal card with each sentiment. Here's a picture of each of the different sentiments:

And here's the group of teal cards.

Thanks for stopping by!
Karen

Monday, June 20, 2011

Floral Place Card Holders

This is my third week as the featured artist on the Our Craft Lounge blog, and this week I created an adorable set of six summery place card holders.

It all started with some large binder clips and the Pretty Petals stamp set from Our Craft Lounge. The flowers in this set are so gorgeous!!!

I was in a cutting mood so I decided to paper piece the flowers and leaves in their entirety, and gave my copic markers the day off. I pulled out my Basic Grey Green at Heart paper pad and set to work. The oranges, pinks and purples are such a fun combination, and so cheery too!

I added some Rockin' Pink Sparkly Fluff to the center of each flower for a pop of bright colour and a hint of sparkle and texture.

Here's a picture of the back of the flower so you can see how I attached it to the metal clip. I applied a blob of glue (that's the technical term) to the back of the flower, placed the metal end in the glue and topped it with a circle of patterned paper to keep it all in place.

I used these for place card holders, but you could also use them to hold a photo, or as a fun and decorative way to close up a gift bag, and they might even work as a book mark too.

Thanks for stopping by!
Karen

Monday, June 13, 2011

Full of Beans

This is my second week as the featured artist of the month on the Our Craft Lounge blog and this week I'm full of beans!

Well, not literally, but I did decorate a cute little band aid tin to house a coffee shop gift card!!

I used the fun Fueled by Caffeine set from Our Craft Lounge and paired it with some My Mind's Eye Stella Rose patterned papers. The carafe is coloured with copics but the circles are paper pieced for a little texture. I had coloured them first, but it looked a little too plain for my liking. Instead of accenting with buttons, I used some real coffee beans, and boy did it smell good in my stamp room when I opened the bag of beans!! They were a bit of a pain to adhere because of the oils in the bean, but I worked at it and thankfully some Zots did the job.

I stitched up a simple pocket to house the gift card and it fits perfectly inside the tin, making it easy for the recipient to get the card out.

See you next Monday for my third OCL post!
Thanks for stopping by!
Karen

Monday, June 6, 2011

A Jazzed Up Notepad

I'm so lucky to be the Artist of the Month for Our Craft Lounge over on the OCL blog!!!

For my first project of the month I created a fun little covered notepad. I saw this style of notepad at Staples and brought one home as a prototype, but the one I made is way cuter!  ;-)

I used images from the Tree-iffic Trees set to decorate the notepad holder. The images were stamped with Memento Tuxedo Black and coloured with copics. The patterned papers are all from the Basic Grey Hello Luscious pad. I paper pieced the smaller circles on the tree and wanted the coloured part to look like leaves so kept adding dots of green to create that effect. I coated the trunk with Coffee Bean Sparkly Fluff for texture and a whimsical feel.

There's lots of dimension on the image.

I used a Basic Grey magnet to keep the flap closed and hid the inside magnet under a circle of patterned paper. You could definitely do this with any size notepad. I hope you'll give it a try!

Thanks Our Craft Lounge and see you next Monday with another OCL project!
And thank YOU for stopping by!
Karen

Thursday, February 10, 2011

Sweet Sunday Reindeer - on Thursday

I was a little busy this past weekend...skiing in Vermont (I know...rough life!) so I didn't have a chance to get my card done for the Sweet Sunday Sketch Challenge, SSSC103. But I couldn't let the week go by without playing along.

Today I'm sharing my Project Christmas 2011 Card #5 and Card #6. Yay!! I can't believe I actually remembered to make more than one card! Actually though, this stamp set had me cracking up every time I read the joke sentiments, and I just couldn't decide which to use.  :-)

The reindeer images are from Reindeer Games by Our Craft Lounge and the joke sentiments are a companion set called Reindeer Pun. Both images are stamped with Memento Tuxedo Black and coloured with copics. The patterned paper is My Mind's Eye Snowed In from a couple of years ago. I added plenty of stitching and some Twinkles for a little sparkle.

Then I added a simple scalloped layer to the inside so I could stamp the punch line.

Here'sthe second card...

And the inside...

These are my kinda cards...cute AND funny!!!

Thanks for stopping by!
Karen

Wednesday, November 17, 2010

Happy Winter

When I was blog surfing this week I saw a fun sketch on the OCL blog, OCLDT39, which I knew would work perfectly with my new OCL stamps, Penguin Fun. I picked up this set along with Snowy Sayings when Dana and I stopped at The Great American Stamp Store in Connecticut, on our way home from our road trip a couple of weeks ago.

I stamped the penguin with Memento Tuxedo Black onto Choice Buttercream and coloured him with copics. I paper pieced his toque with one of the patterns from my Basic Grey Jovial pad then added white liquid applique to the pompom. The fun snowman paper seemed like just the right paper to compliment the penguin and I paired it with intense teal and blush red dark. My swiss dots and d'vine swirls embossing folders added plenty of texture. The ribbon is PTI and I tied on the sentiment with Divine Twine.

Hopefully I won't be needing a toque or scarf for another few weeks, but once the snow does arrive I hope it stays so the ski hills can open.  :-)

Thanks for stopping by!
Karen

Monday, July 13, 2009

My Support Team...

ETA: Mel aked which line of Primas I used because it has skulls on it. I didn't even notice that was what was printed on the Primas...too funny! Here's what the back of the Prima packaging says: #714659-Petal Pallette Pink/Lime. The flowers come in a tube that's crimped at the top. Hope that helps! Thanks for pointing out the skulls Mel!

This card cracks me up!!! But I made it with a very specific purpose in mind.
When I was in Manhattan a few weeks ago one of my shopping missions was to go for a proper bra fitting at a specialty store. After all, as Stacy and Clinton say, the girls need to be taken care of, right? So I googled bra stores and found Bra Tenders, which was only two blocks from our hotel (and Crystal, my fit specialist, told me that Stacy and Clinton have brought people to them!!!). I liked that they're an independent business that's been in business for a long time with plenty of repeat clients. Needless to say, the proper bra really does make a difference...and makes you look slimmer too. It really was an uplifting experience!!! :)

As soon as I saw Granny's Support Team from Our Craft Lounge I knew it was the perfect set to use for my thank you card to the staff at Bra Tenders. I didn't plan that the card would be sooooooo bright but it'll actually fit in well with the store decor because they've got it decorated like you're on Broadway...bright, fun and cheery, just like this card. I used the Weekend Sketch #88, hosted by Jenn Balcer, for the layout.

I stamped Granny and the bra with Memento Tuxedo Black onto Choice Snow White and coloured them with copics. I added some black dots to the bra with my Copic Multiliner so it would coordinate with the green panties on the chair. I also added lime green Stickles to the flower centers on Granny's dress. I cut the bra out with Labels Four Nestabilities and cut out Granny with rectangle Nestabilities.

I chose the yellow floral pattern from my new Basic Grey June Bug 6x6 pad. The solid colours are Intense Kiwi, Blush Red Medium and Intense Orange, all by Prism. Once I had all my layers and strips in place I sewed around the edge with my Janome. The striped ribbon is from my stash and I love how it brings together all the colours. A few Primas and my favourite sentiment treatment, a banner, finished the card perfectly.

I can't wait to get this in the mail cause I know they'll get a good chuckle out of it at Bra Tenders (don't you just love that name...I love saying it!).

Thanks for stopping by!
Karen